Create a parcel with snapping
This exercise creates a new parcel draft from the main parcel map and shows the difference between a point-snap candidate and an edge-snap candidate. It takes approximately 10 minutes.
Access for this tutorial
Use an Editor tab from the first tutorial, or sign in with a username and password for an account with Editor access to the synthetic training dataset. Stay in that tab throughout the exercise. See Tutorial access for both options.
What you will learn
By the end of the exercise, you can:
- configure boundary snapping on the main map;
- create a new parcel draft in map edit mode;
- recognise point and edge snap indicators; and
- verify that the new parcel appears in Workflow Tasks.
The exercise changes training data by creating a workflow draft. It does not
create an official parcel. Use only the synthetic parcel assigned by your
trainer. The example below uses SYN-009 v1.
1. Configure snapping
Open Parcel Map, select Map Settings, and find Boundary snapping.
Enable Point snapping and Edge snapping. Leave Follow edge off for
this exercise. Use a maximum snap distance of 5 metres and a minimum snap zoom
of 17, then close Map Settings.
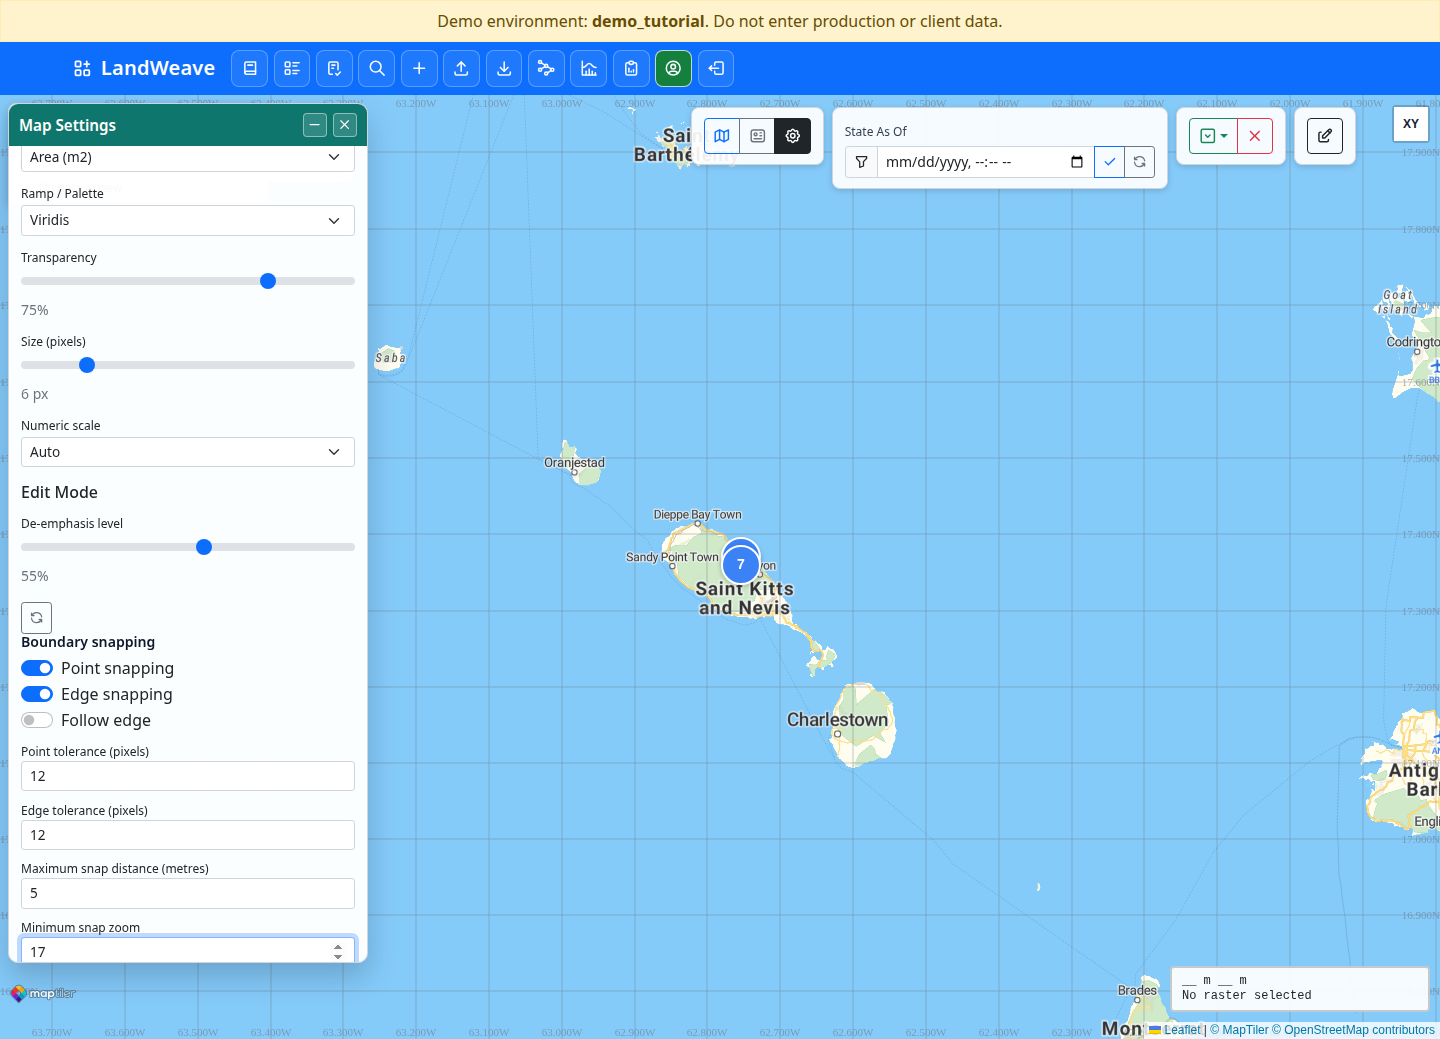
These preferences belong to your account. Point tolerance and edge tolerance control how close the pointer must be on screen. Maximum snap distance is a separate ground-distance limit in metres.
2. Enter map edit mode
Select Edit Mode on the main map. Zoom to SYN-009 v1, then select the
polygon drawing tool. Stay at zoom 17 or higher; snapping remains inactive
below the configured minimum zoom.
Move the pointer towards the southwest corner of SYN-009 v1. Do not click
until the blue point marker appears. The blue marker means the existing parcel
vertex is the current point-snap candidate.
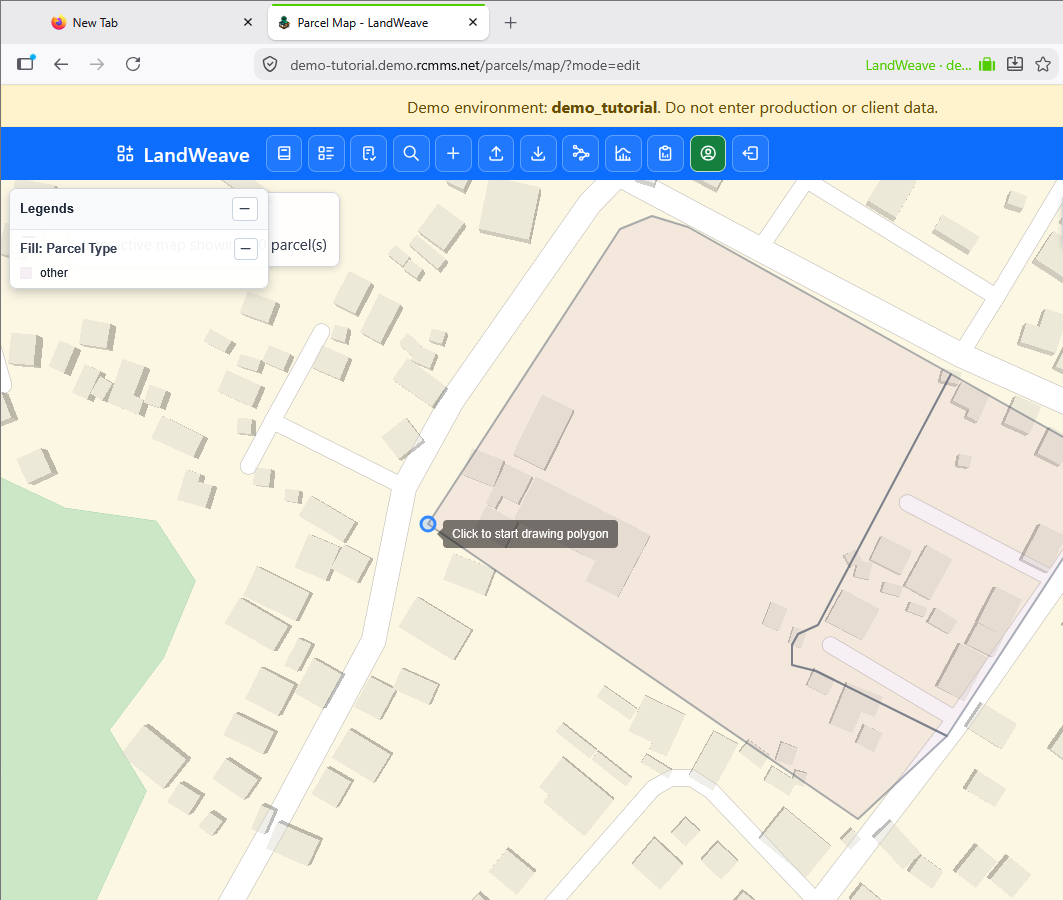
Click once to place the first vertex. The browser asks the server to confirm the exact authoritative coordinate. Wait for confirmation before continuing.
3. Recognise an edge snap
Move the pointer along the long diagonal boundary of SYN-009 v1. Away from
its corners, the candidate changes to a yellow edge marker. A dotted guide
connects the last vertex to the candidate point.
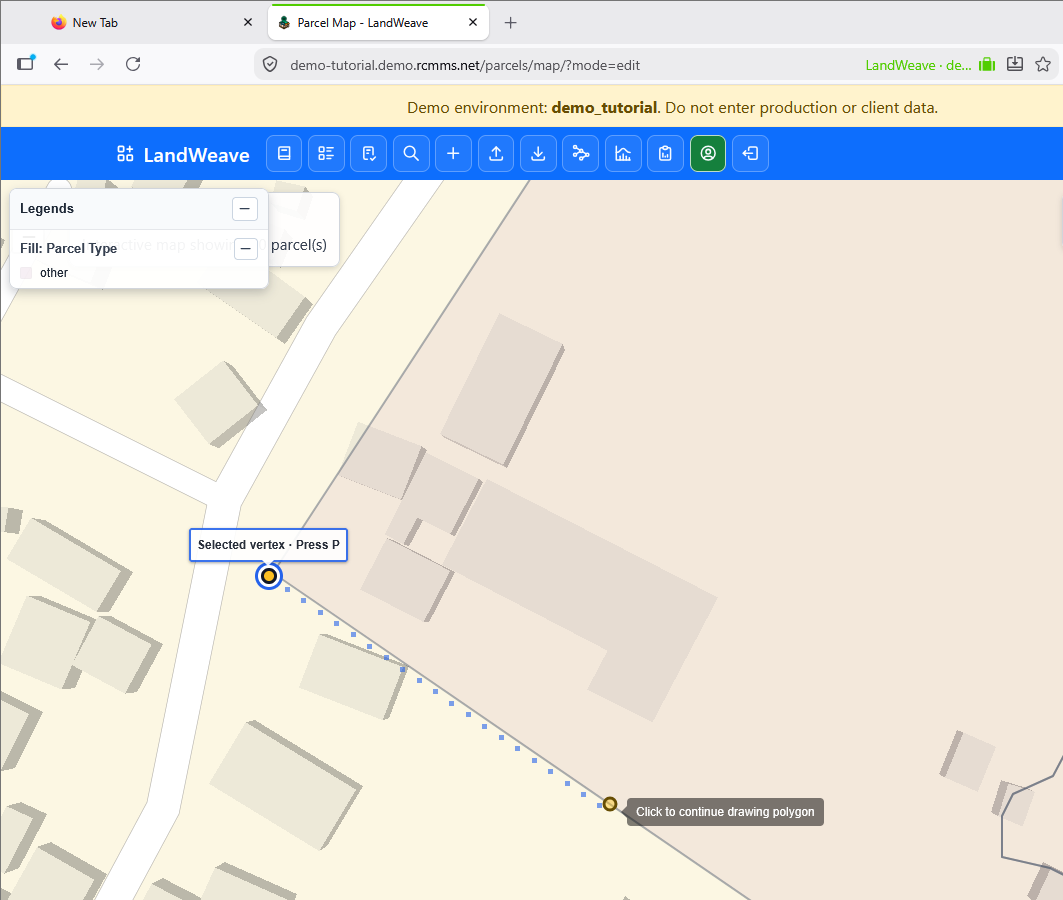
This image demonstrates the edge-snap indicator only. Do not click the yellow marker in this exercise. Move away from the boundary before placing the next vertex. The finished example therefore has one point-snapped corner and no committed edge snap.
Point candidates take priority when a point and an edge are both within their tolerances. An edge snap becomes part of the parcel only when you click while the yellow candidate is active and the server confirms it.
4. Complete the parcel outline
Continue around the approximate exercise boundary. Keep the new parcel outside
SYN-009 v1, except for the shared snapped corner. Click the first vertex to
close the polygon.
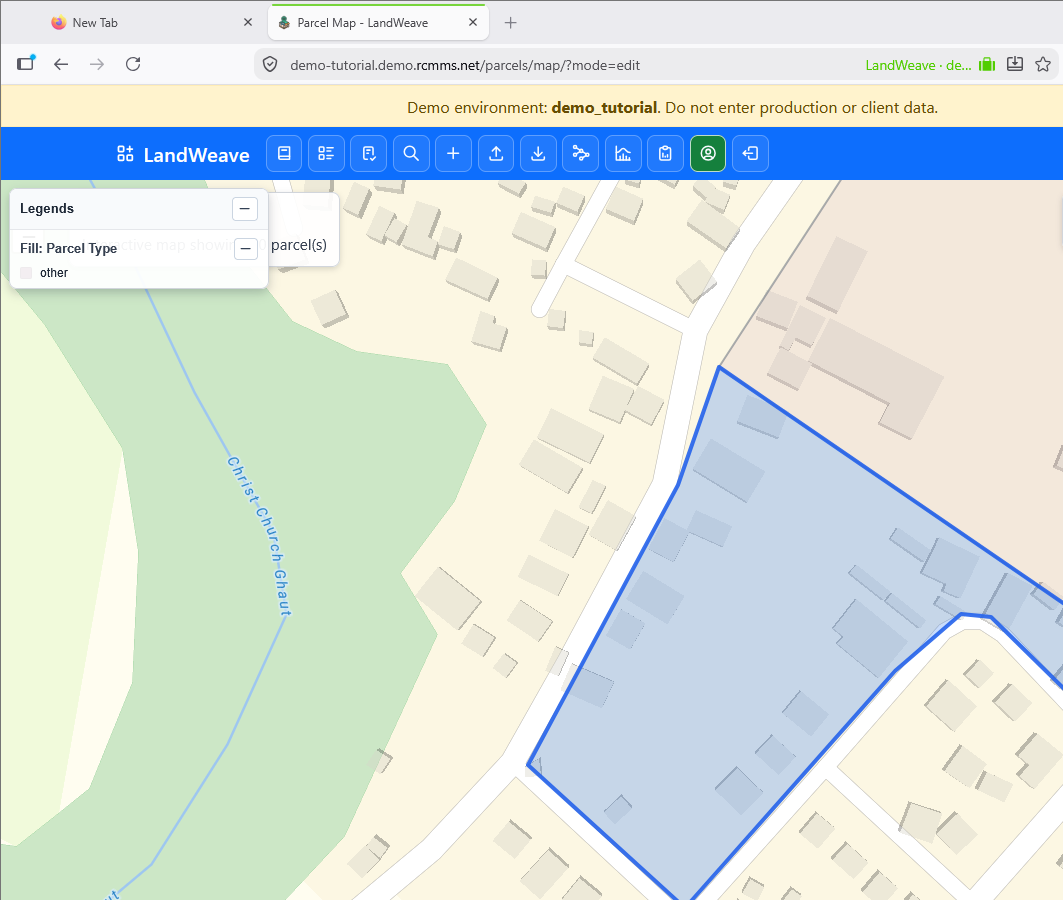
Inspect the outline before continuing. If a vertex is wrong, use the drawing toolbar to correct or cancel the geometry. Select Finish only when the outline is acceptable.
5. Describe and save the draft
After Finish, scroll below the map. Check the reported polygon area, then complete the new-parcel form. The example uses:
| Field | Example value |
|---|---|
| Parcel ID | TUT-SNAP-001 |
| Name | Snapped corner tutorial parcel |
| Parcel Type | Residential |
| Description | Tutorial parcel with one corner snapped to SYN-009 v1. |
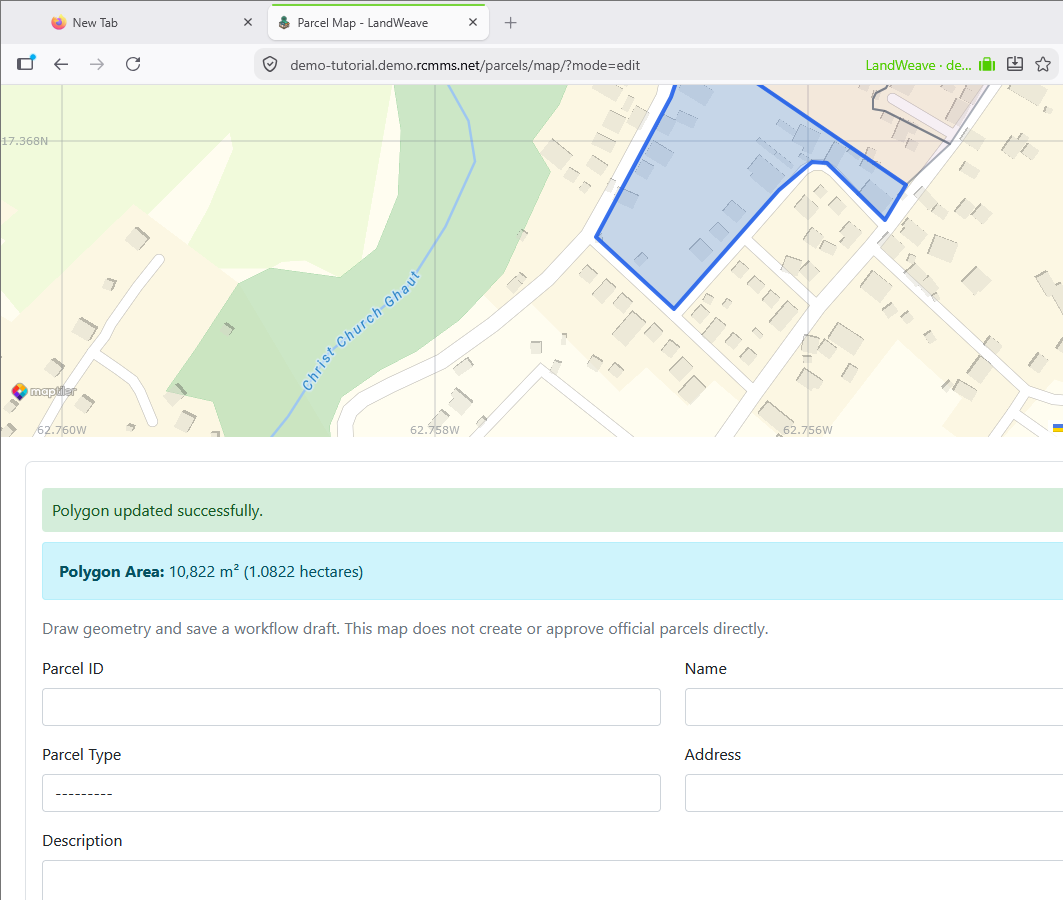
Select the blue save button. This saves a workflow draft; it does not alter
SYN-009 v1 and does not make the new parcel official.
6. Verify the result
Open Workflow Tasks. Find the new parcel ID and check that:
- the task is Editing and New Chain;
- the state is Draft; and
- Update Draft, Submit Draft, and Cancel Draft are available.
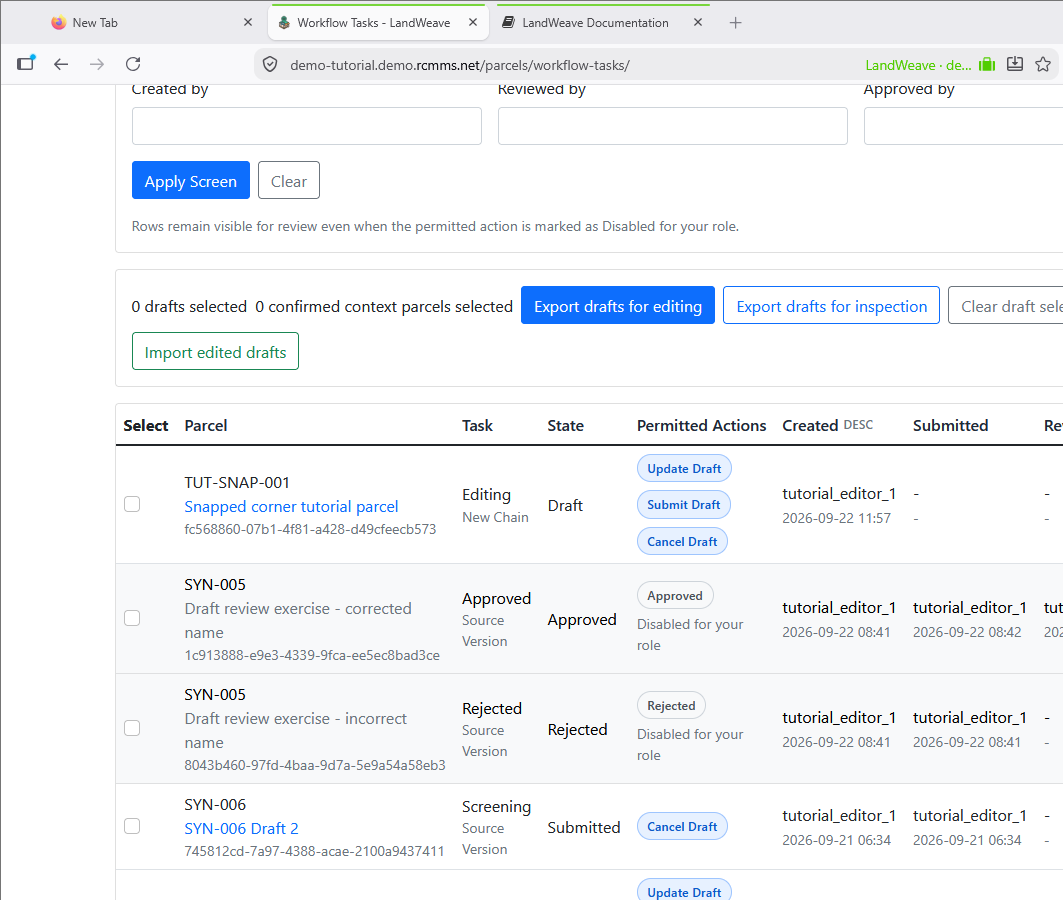
The draft now retains the confirmed point-snap provenance. If SYN-009 v1
changes before this draft is approved, LandWeave rejects the stale snap rather
than silently moving the new parcel.
Try it independently
With a trainer-assigned parcel, begin another polygon and identify one blue point candidate and one yellow edge candidate. Cancel the drawing without saving. Explain which candidate would have priority near a corner and which action would commit a candidate to the new parcel.
For the full behaviour and failure rules, see Boundary snapping in parcel editors.