Introducing LandWeave
Access for this tutorial
Use the Viewer tab from the first tutorial, or sign in with a username and password for an account with Viewer access to the training dataset. Stay in that application tab throughout the exercise. See Tutorial access for both options.
The first tutorial followed a parcel change through several roles. This second tutorial gives you time to become familiar with the workspace: finding parcels, reading their information, and moving between the map and list.
Allow about 10–15 minutes. You will inspect information and change your view and selection, without changing parcel records.
Use the synthetic dataset and parcel identifiers supplied by your trainer.
The screenshots use Tutorial Demo Parcels, with SYN-004 as the main
example. Names, dates, and history may differ if someone has completed another
exercise or the demo has been reset. Use only synthetic training information.
1. Check your account and dataset
Point to the profile icon in the top toolbar. Its tooltip identifies your account and role. Select it to open My Profile.
Under Active Dataset, check the dataset name. A dataset is the collection of parcels you are working with. The map and list show information from the active dataset that your account is allowed to access.
If necessary, choose the training dataset specified by your trainer and select Set Active Dataset. If it is missing, ask your trainer to check your access.
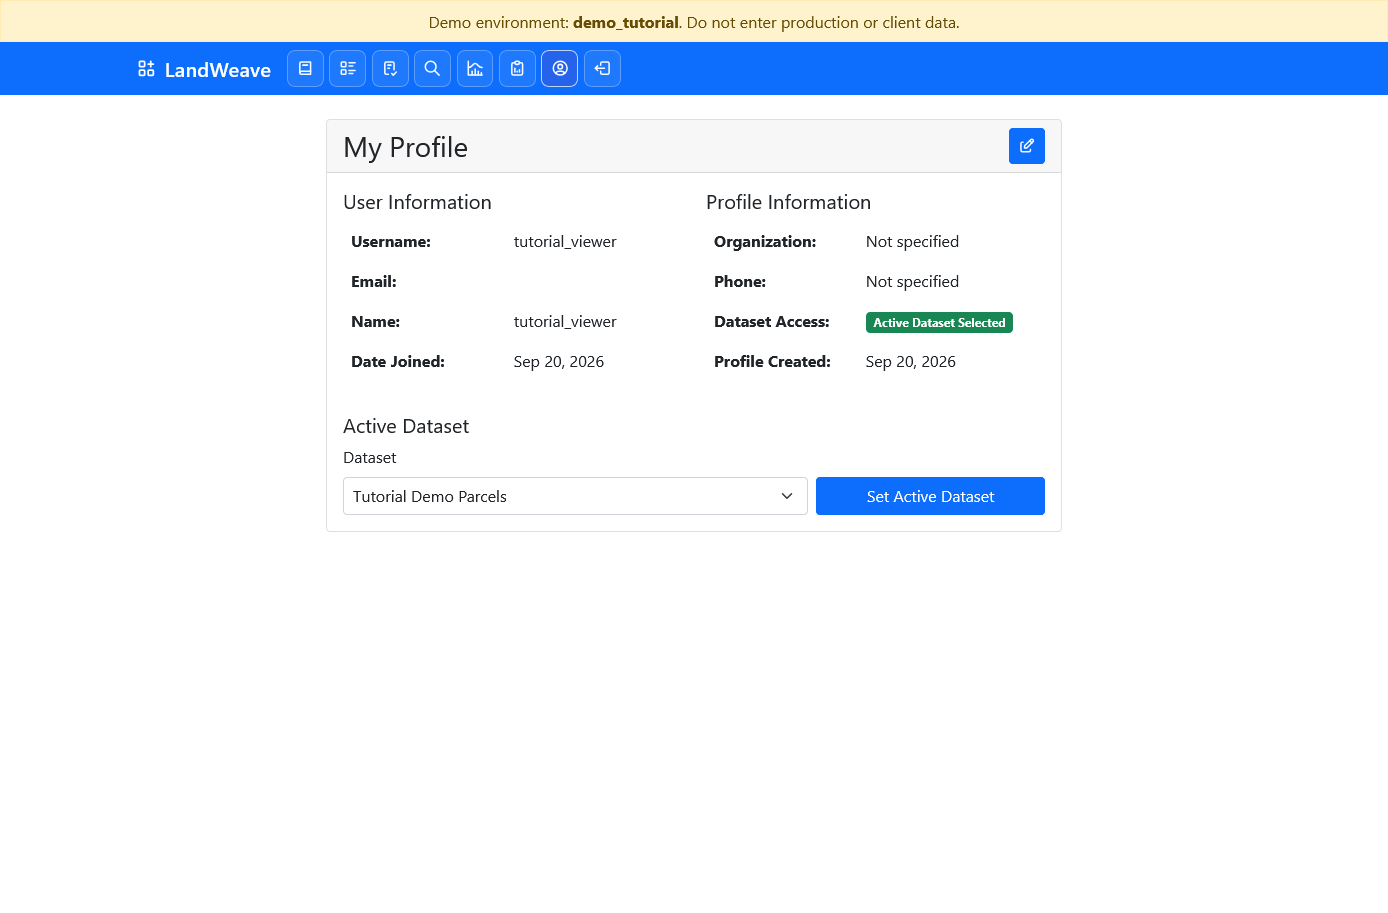
Check: you recognise the signed-in account and the training dataset.
2. Find your way around
The top toolbar uses icons. Point to an icon to read its name before selecting it. Start with these destinations:
| Destination | What it opens |
|---|---|
| LandWeave / Map Home | The main parcel map; select the LandWeave name at the left of the toolbar |
| Documentation | These guides in another browser tab |
| Parcels List and Filter | Parcel cards and search/filter controls |
| Search Parcels | The same list and filter page |
| Profile icon | Your account information and active dataset |
Other icons support workflow tasks, statistics, and reports. Available actions depend on your access. You can return to this exercise's application tab after consulting documentation.
Select LandWeave to open the map.
Check: you can identify how to return to the map, open the list, and find help.
3. Explore the map
- Select Zoom to All Parcels to fit the dataset into the map.
- Drag the map to pan. Use the mouse wheel over the map to zoom.
- Select Show Labels to identify parcels. Labels may show a parcel's name, so use its identifier in the list when you need an exact reference.
- Select Zoom to All Parcels again when you want to regain your bearings.
At a wider zoom, parcels may appear as a numbered cluster. Zoom in to see individual boundaries. Leave State As Of blank for this exercise so you are looking at the current parcel state.
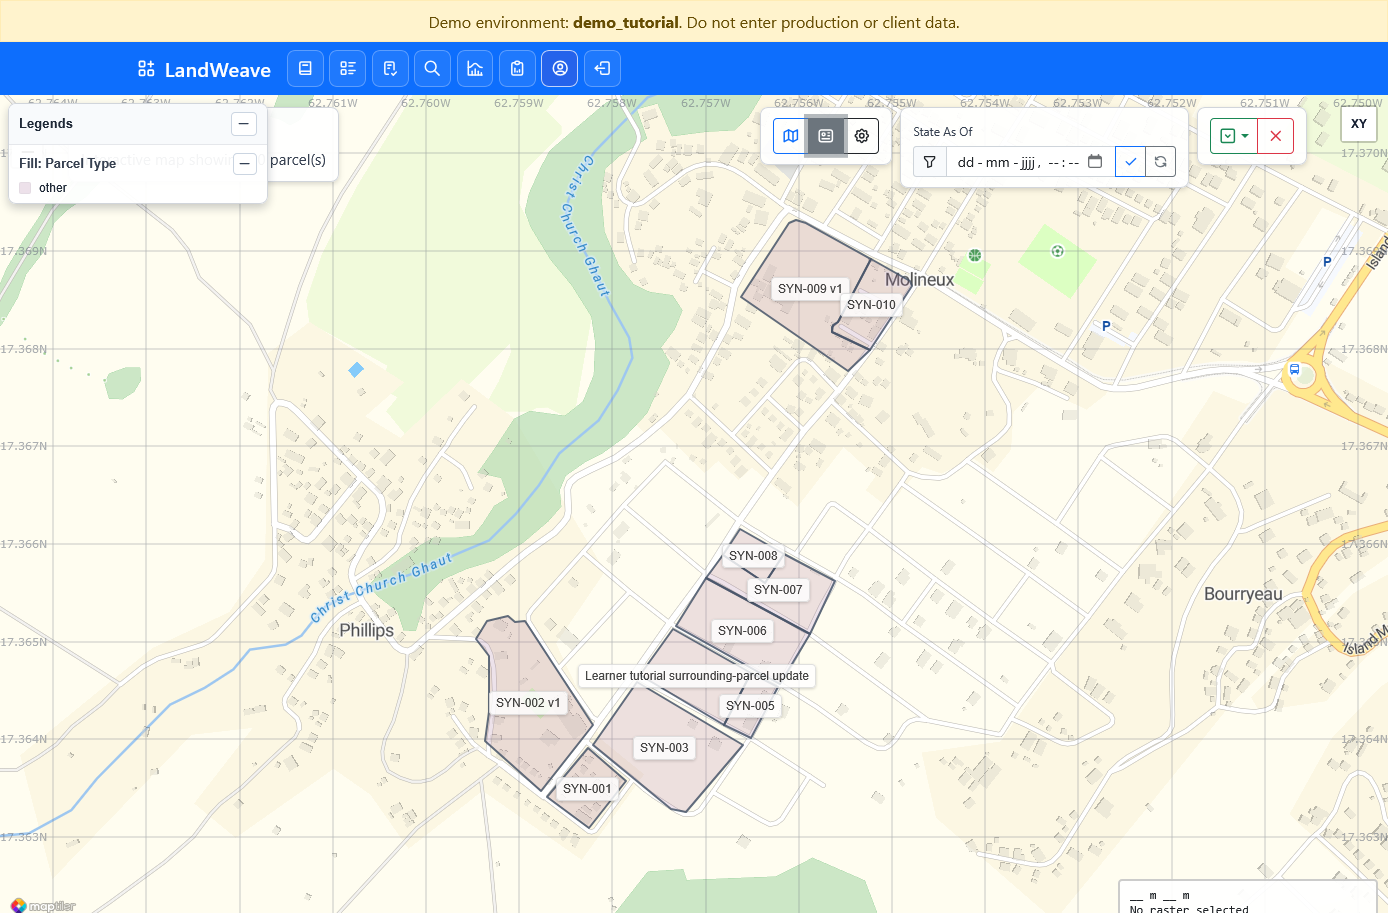
Select the Settings gear to open Map Settings. Under Background Layers, find Basemap. Try another available background, or None, then restore your preferred background. The screenshots use MapTiler Streets; the available choices depend on the installation.
Changing the background changes how you see the parcels. It does not change their boundaries or attributes. Close the settings panel with its × button.
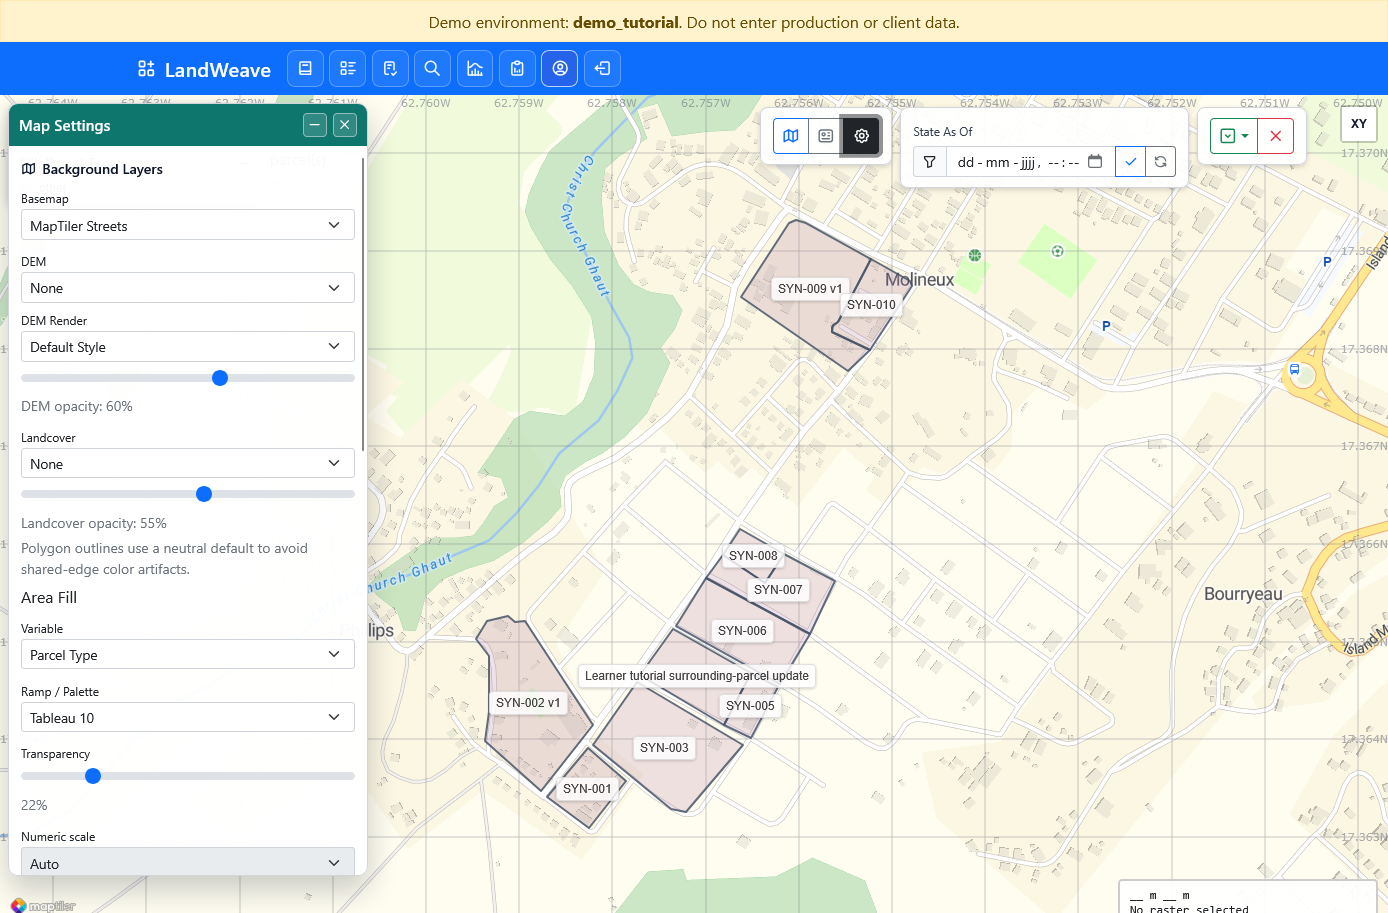
Check: you can move around the map, recover the dataset view, and identify where to choose a background.
4. Find a parcel in the list
Select Parcels List and Filter in the top toolbar.
- In Search & Filter, enter
SYN-004in Parcel ID contains..., or use the identifier supplied by your trainer. - Select Apply Filters, the funnel button within Search & Filter.
- Read the matching card: it shows the parcel's name, identifier, type, and area.
The screenshot's parcel name reflects the approved change from tutorial one.
Its identifier is still SYN-004.
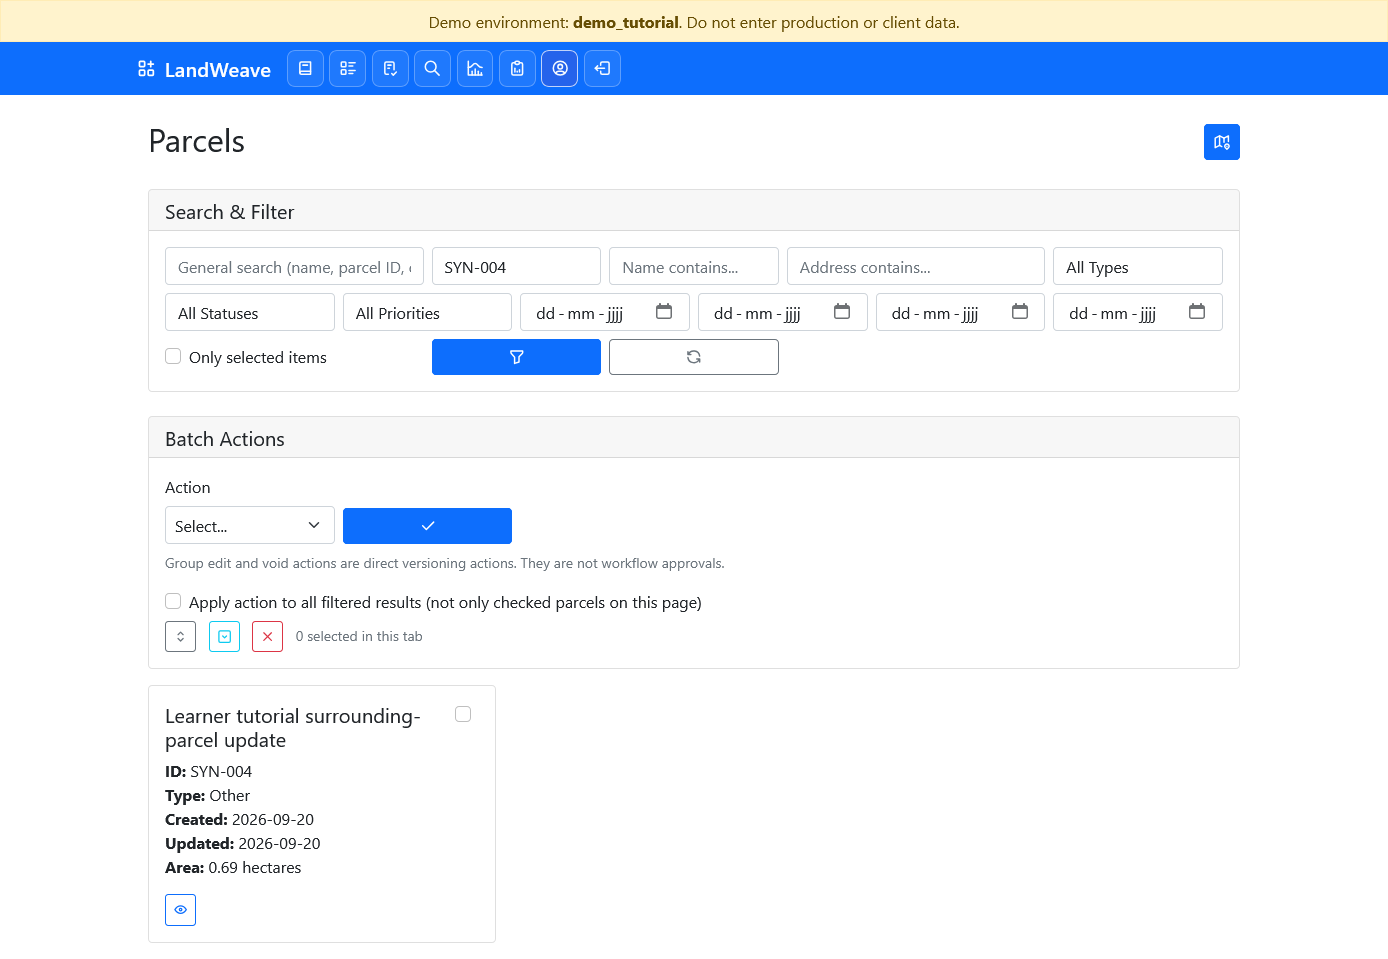
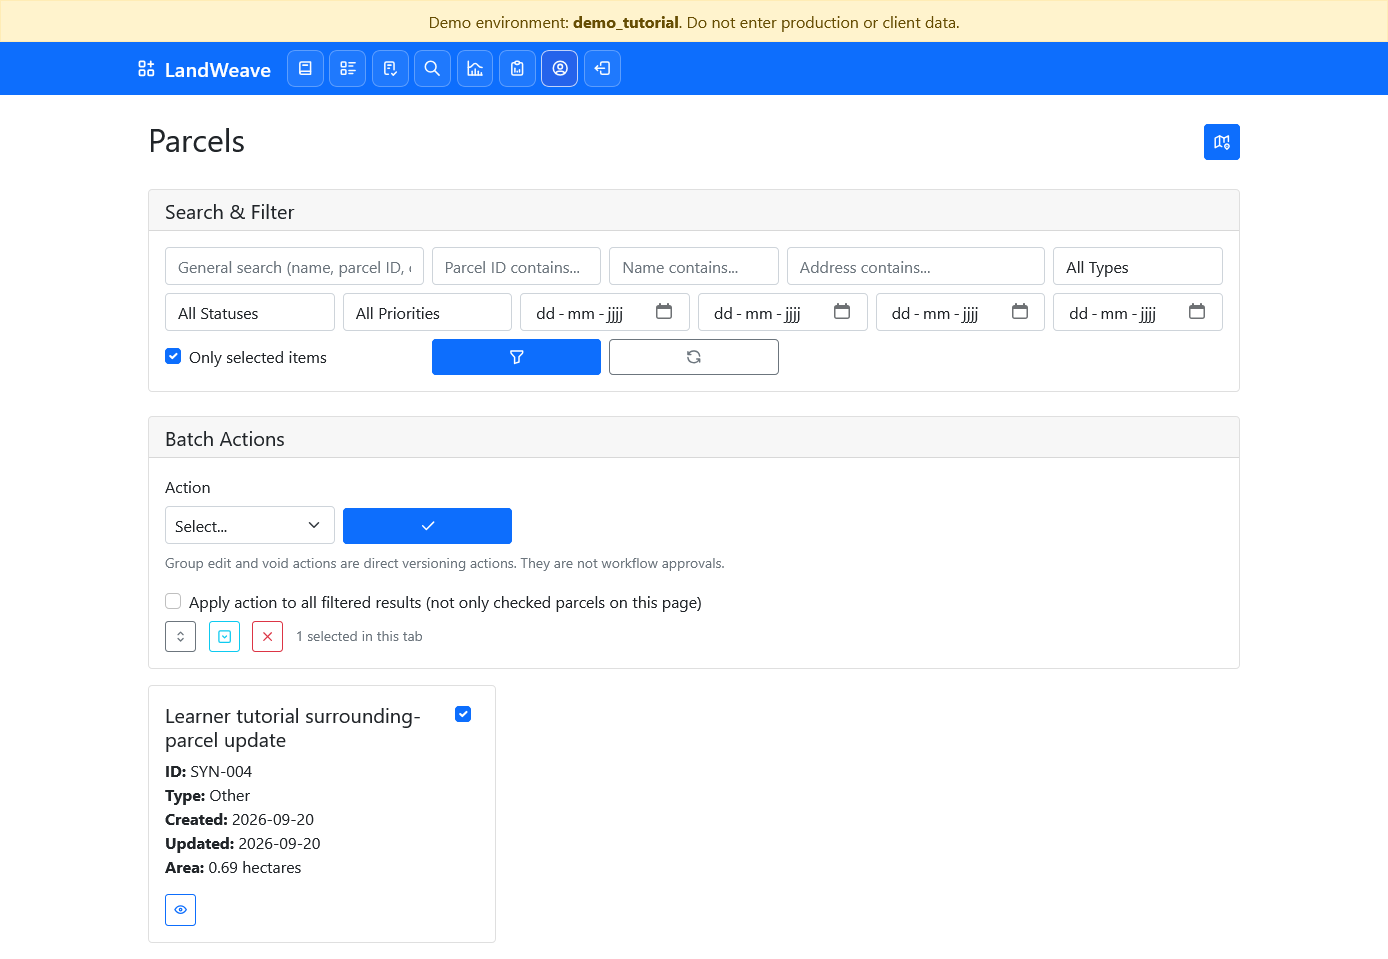
Filtering narrows the results shown. It does not select the matching parcels. The card checkbox and selection count serve a separate purpose, which you will try in step 6. Leave Batch Actions unused during this tutorial.
Check: the result's identifier matches the parcel you intended to find.
5. Read the parcel and its surroundings
Select the card's eye button, View Parcel SYN-004, to open its detail page. Check the Effective Role badge and read Parcel Information:
- Parcel ID identifies the parcel you found.
- Name and Type describe it.
- Area is displayed in hectares and square metres.
- Valid From, Valid To, and Record Status describe the version you are viewing. In this example, Valid To: Current and Record Status: Active identify the current active version.
Beside the attributes, Parcel Location shows the parcel boundary. Select Show surrounding parcels, then zoom out once or twice to see its neighbours. The subject parcel remains visually emphasised.
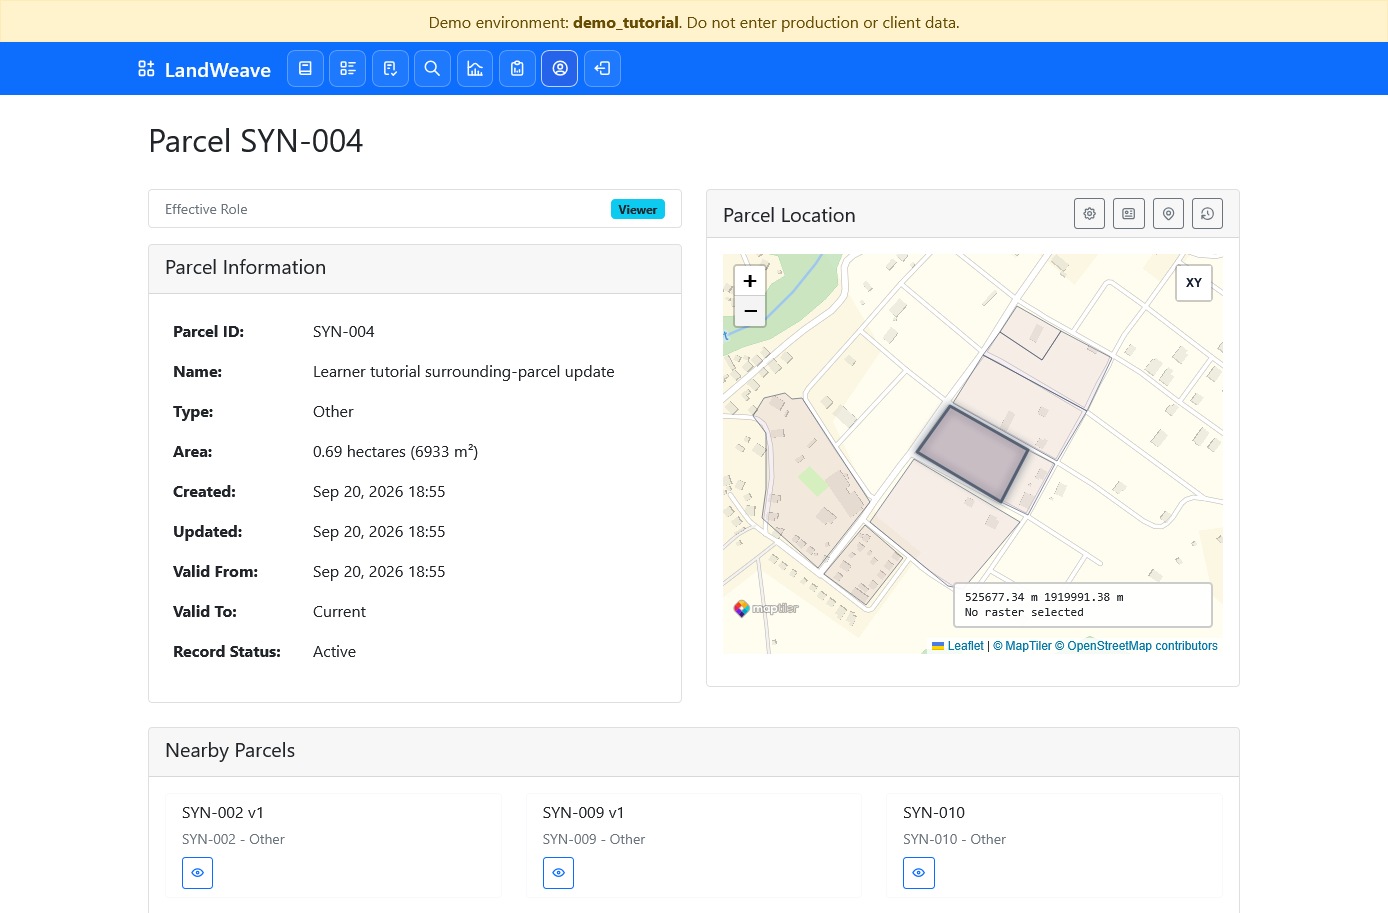
Check: you can state the parcel's identifier, type, and area, and locate it among the surrounding parcels.
6. Carry a selection between list and map
Return through Parcels List and Filter. Use Reset Filters in the Search & Filter panel if a previous filter is still present.
- Tick the checkbox on the
SYN-004card, or your assigned parcel's card. The counter should show 1 selected in this tab. -
Tick Only selected items, then select Apply Filters. The list now shows only your selected parcel.
-
Select Open Map at the top of the list. Use Zoom to All Parcels if needed. Your selected parcel has a stronger outline and glow.
-
Open Select parcels, the green dropdown, to see the selection count. You do not need to draw a selection shape for this exercise.
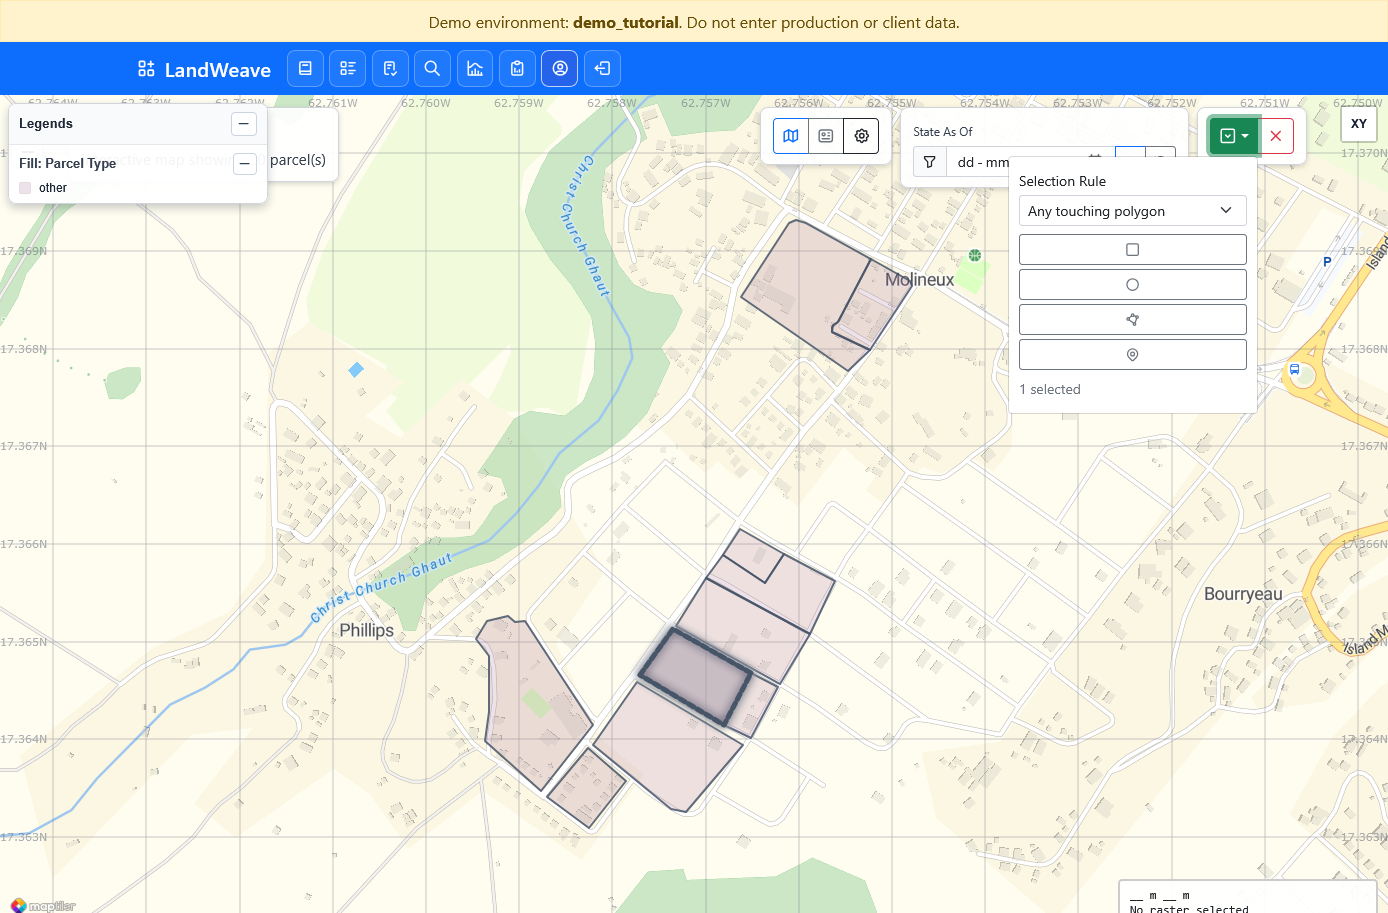
-
Return through Parcels List and Filter. The parcel's checkbox remains ticked even when the list shows other parcels too.
- Select Clear All Selected, the red × near the selection count, then Reset Filters. The count returns to zero and the list is unfiltered.
Selection belongs to the current browser tab. Navigating between the list and map in that tab keeps it; another role tab can have a different selection. Resetting filters and clearing selection are separate actions. On the map, Deselect also clears the current tab's selection.
Check: the same parcel stayed selected across both pages, and you can clear the selection without changing any parcel information.
7. Recognise official records and proposed changes
Find SYN-004 again and open its detail page. Scroll down to History.
In the illustrated example, an earlier version is Superseded, while the
current version is Active. Valid From and Valid To show the periods
covered by those versions. Viewing marks the row currently open.
Below this, Parcel Draft Workflow and Workflow Events show the change from the first tutorial, including its APPROVED state and the actions of the Editor, Reviewer, and Approver.
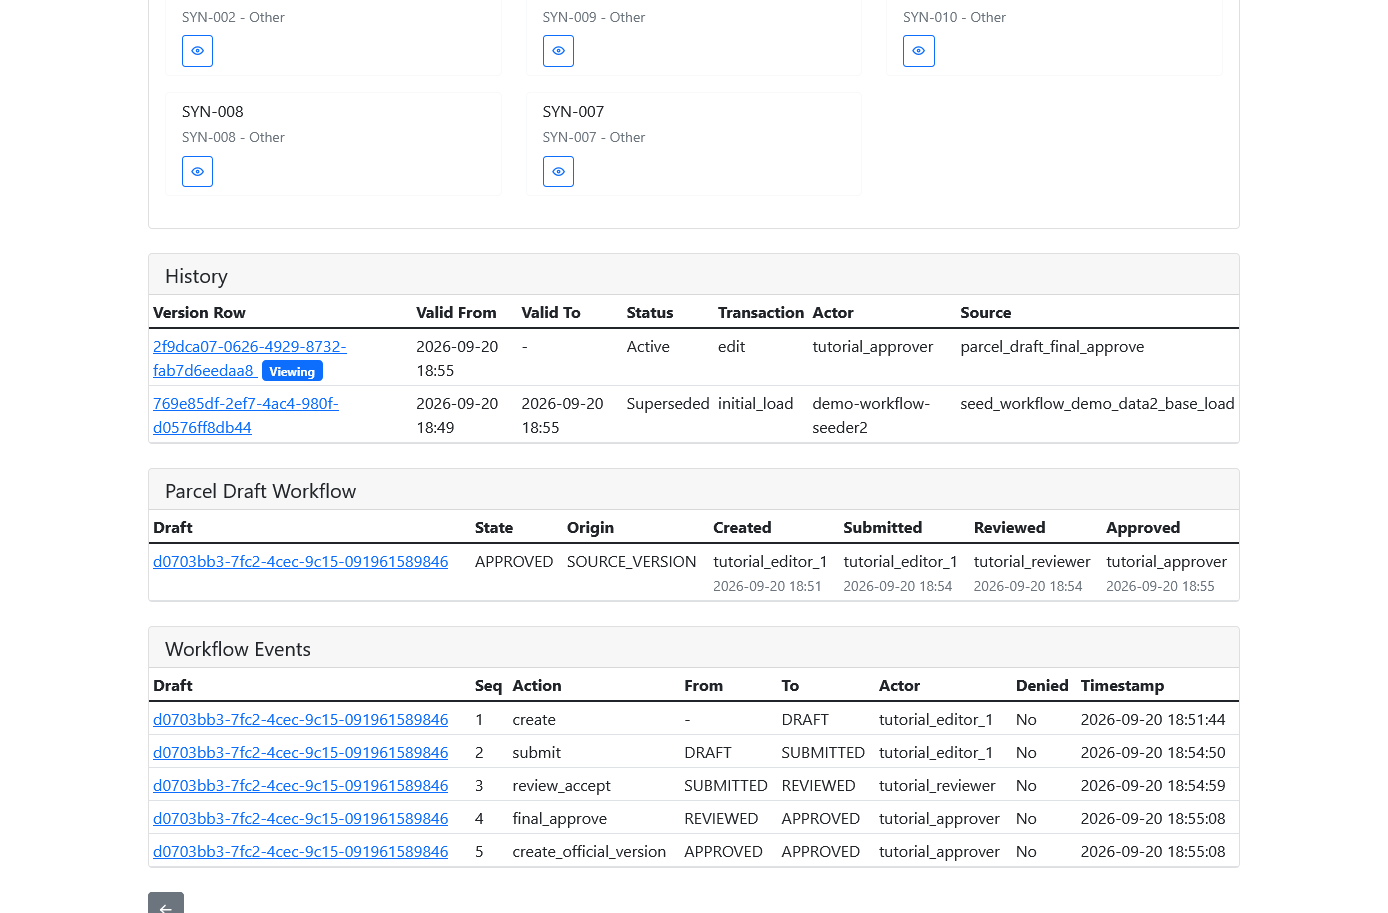
A draft records a proposed change. Saving or submitting one does not by itself replace the official parcel. In the workflow you followed in tutorial one, final approval created a new official version and retained the earlier version in history. As Viewer, you can inspect this record without making a decision.
If your assigned parcel has no completed change, it may have only its initial version and no draft history. Ask your trainer for an example with a completed workflow to compare with this screenshot.
Check: you can distinguish the official parcel versions from the proposal and decisions that produced a change.
8. Try it independently
Use another assigned parcel, such as SYN-003 in this demo:
- Find it by identifier and report its type and area.
- Open its detail map, show surrounding parcels, and locate a neighbour.
- Check whether it has one version or several in History.
- Return to the list, clear any selection, and reset the filters.
- Return to Map Home with State As Of blank.
You should be able to explain which dataset you used, how you found the parcel, and why changing a filter, selection, or map background did not edit its record.
For more detail, see Map View and Selection Tools, Parcels List, Search, and Filter, and ParcelDraft Workflow.